In the wake of the Flint, Michigan water crisis, many of the country’s public school systems have begun testing their own water for lead, either because of new state regulations requiring them to do so, or simply to be proactive. With elevated levels of lead already found in public schools across the country, including Massachusetts, New Jersey, and Maryland, you may be wondering what you can do to test your own school’s water for elevated lead.
—01
Find a Lab Certified by the Department of Environmental Protection
Step 1: Go to this EPA webpage. Choose your state and you will be directed to a list of DEP-certified labs in your state. You can also call the EPA Safe Drinking Water Hotline at 1-800-426-4791. If you call this number, they can give you a list of DEP-certified labs near you.
Step 2: Get your sample collection kits. Be sure to contact your water supplier first. Some states, such as Maine, have programs in place to give schools a portion of water sample kits for free. By contacting your city’s water department, you can avoid spending extra money on something for which the state has already allocated funds. Ensure you receive the adequate number of kits. You will need to take a sample from every water source that could potentially be used for drinking water. This includes all water fountains, any faucets in classrooms, and any faucets in kitchens used to prepare food.
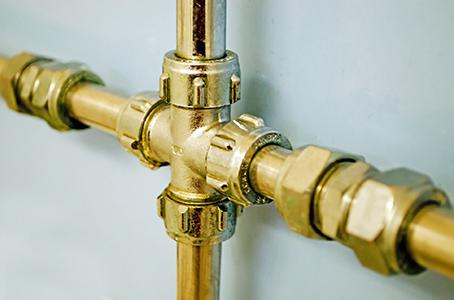
Step 3: Collect your sample pre-flush. This means take the sample after water has been stagnant in the pipes for at least eight hours. You may need to go into the building on a day that school is closed, or take the sample early in the morning, before school opens. This pre-flush sample will determine if the pipes in the building are made of lead. Some labs will ask for a second sampling. After all of your pre-flush samples are taken, go back to each water source and take a second sample. This sample will reveal if there is any lead in the header pipe. The header pipe is underground, sometimes referred to as the pipe at “street level”. This is the pipe that would connect the school’s plumbing system to the municipal water line. Taking all of these samples might be difficult for only one or two people to execute. It may be worthwhile to make this a class activity or connect with the Environmental Club, if your school has one.
Step 4: Drop off or mail your samples to the lab. If you live in a state that provides free sample kits to schools, these will often come with prepaid postage.
Step 5: Wait for your results. Most labs will send the results by mail, but some will email the results upon request. Because of the large quantity of samples needed to be taken, it will usually take a few weeks for labs to complete the testing. In the state of Illinois, for example, it can take a month or longer.
Step 6: Inform parents of the results. This is especially true if any of the water sources are found to have elevated levels of lead. Parents must be kept in the loop.
Step 7: Shut down any water sources found to have elevated lead levels. If a water source has levels of lead higher than 15 parts per billion, tape up the faucet or drinking water spout so that it is not accessible, and place signage on the fixture, indicating that it is not safe for consumption. If elevated levels are found in bathroom faucets or utility sinks, these are safe to use for hand washing, but place signage so that it is never used for drinking water. Signage should read something like, “Water Safe for Hand Washing Only. Do Not Drink!”
Pros: Peace of Mind You know you can trust the results of a DEP-certified lab. You will receive a full lab analysis reporting exactly what is in your water. It will detail the lead elevation in parts per billion or milligrams per liter.
Cons: Turnaround Time & Inconvenience Both collecting the samples and waiting for the samples to come back from the lab are time-consuming processes. Depending on the size of your school, it could take quite a while to take a sample from every drinking water fountain, classroom faucet and kitchen faucet. It will be even more time-consuming, if you decide to also test bathroom faucets and other fixtures not generally used for drinking water. Once samples are collected, some labs have a mail-in option but many do not. Depending on what state you are in, you could find yourself having to go out of your way to drive to the lab to get the sterile sample containers and then driving back to the lab to drop the samples off. Lab fees can vary and typically range from $12-$80, but as mentioned earlier, some states cover these fees entirely while others provide subsidies. Contact your water supplier or your state’s public works department to find out if you qualify for assistance.
—02
Buy an Instant Home Test Kit
Step 1: Purchase a test kit at a local home improvement store, or order one from an online retailer.
Step 2: Collect the sample, following the same instructions as if you were sending the water away to a lab. Take the sample only after the water has been stagnant in the pipes for at least eight hours. Take samples from every source that has the potential to be used for drinking or cooking.
The second sample, taken after the water has been running for a couple minutes, will test for lead in the building’s header pipe.
Step 3: Place the lead test strip into the water. Many of these kits come with a variety of strips to test for different contaminants, so make sure you are using the strip designated to test for lead.
Step 4: Wait the recommended time frame and then check the strip. Many kits have very short time frames. First Alert will give the consumer results within ten minutes. These tests read “positive” or “negative”. If it reads negative, that doesn’t mean the water is completely lead free. It only means that it doesn’t have more than 15 parts per billion, and therefore any hypothetical lead content is not high enough to register on the test.
Pros: Instant Results and Easy to Use
With an instant test kit, you will have results in your hand in minutes.
The kits are very easy to use. All you have to do is place the test strip into the water sample and wait for results to appear.
Cons: No Lab Report Showing Parts Per Billion
The test kits will only read positive or negative. You won’t receive a detailed lab report, as you would if going through a DEP-certified lab. Subsequently, even if your results come back negative, you have no way to know for certain whether or not lead is present.
—03
Have Your Water Tested by Your Local Water Supplier
Step 1: To find the contact information for your water supplier, visit the website for your local government and look under “Public Works” or “Water and Sewage”.
Step 2: When you contact the water supplier, make sure to tell them you are calling on behalf of a school, and ask if there are any programs in place to assist you with testing your water or if free water testing is something offered to schools in your state.
Pros: Peace of Mind, Free and Convenient
Municipal water suppliers are held to EPA standards. This is the most trustworthy option. If this is an option that your supplier provides, testing will be free. This testing option will not be labor-intensive, as the water supplier will be responsible for the tests.
Cons: Not Always an Option
This is not an option in all states and will therefore depend on where your school is located.
—04
Finding Grants and Funding
There are lots of grants and funding options available to assist public schools in testing their water. The Safe Drinking Water Act was amended in 2015 to make even more funds available to communities. There are a few ways to go about finding a grant to assist you with testing your school’s water.
Step 1:
Start your search by checking out this EPA resource; epa.gov/grants. This site has a lot of information about how to go about applying for grants. It also includes several links to assist you in your search. If you get stuck, you can always contact the EPA directly via their website.
Step 2: To search available grants, go to grants.gov/web/grants/home.html. About halfway down the page, select the tab “Search Grants”. Select the “Funding Instrument Type” as “Grants”. Most of the grants available for the testing of school’s water, will be found under the category “Natural Resources,” which can be selected under the box “Category”. Then search using the terms “water” or “water and schools” in the search bar on the left. This will bring up a list of available grants. You then just need to search through these to find one that is applicable to you. It may be necessary to apply additional filters to your search. You can do this by choosing from parameters, listed on the left-hand side of the screen.
Step 3: You can also go directly through your state or local government. As mentioned earlier in this article, you would do this by going to the website of your local government and looking under either “Public Works” or “Water and Sewage”. Find the contact information for the department to send them an email or give them a call. Ask what grants or assistance are available to help you test your school’s water for lead.